


Fact Sheet FS1329
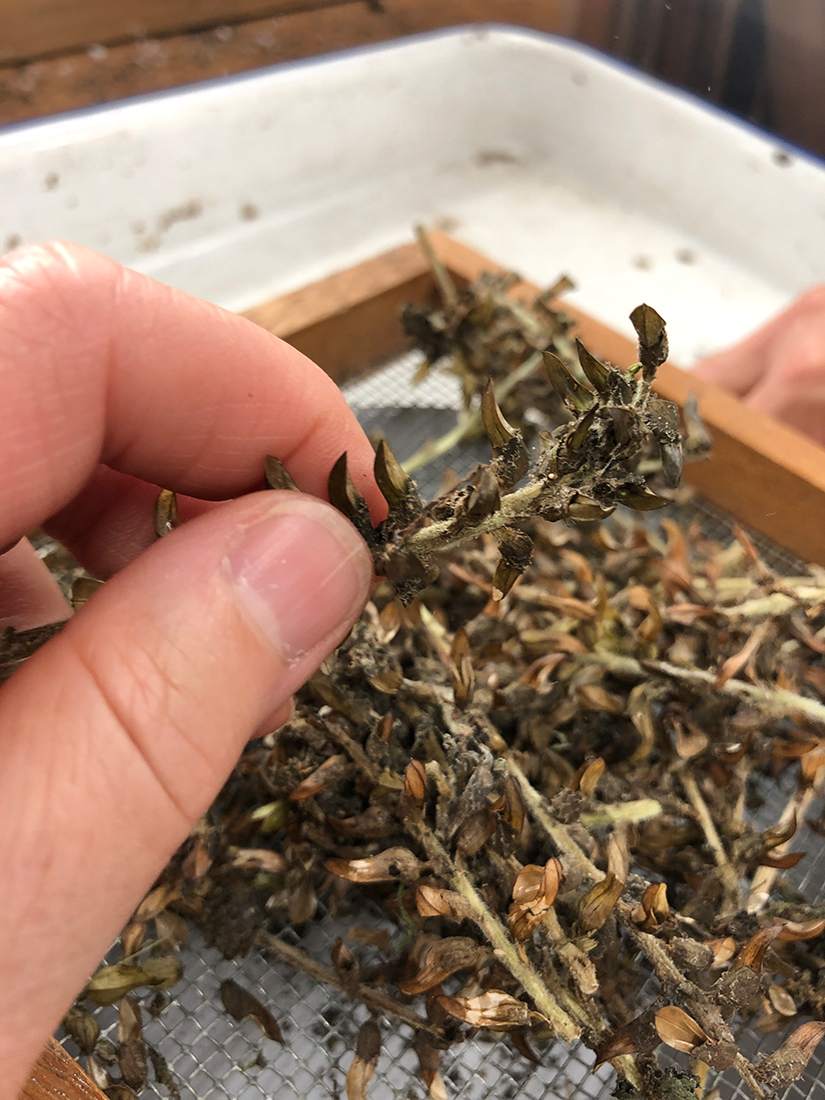
Figure 1. Close up of Pedicularis canadensis (Wood Betony) seed heads.
Plant propagation from seed is an inexpensive way to provide an annual supply of native plants for home landscapes. There is an increased interest in designing with and planting native plants in residential yards. FS1140, Incorporating Native Plants in Your Residential Landscape covers the ecological importance of incorporating native plants into residential landscapes. Native plants can be difficult to find as they may not be widely available at local nurseries. This fact sheet provides instructions on how residents can save seed from desirable plants to produce an at-home inventory of native plants for their yard. Native plants are accustomed to local growing conditions and climate fluctuations and can be easily grown without special tools or a greenhouse.

Figure 2. Pressing edicularis canadensis (Wood Betony) seed heads through a sieve.
Plant propagation by seed provides a simple and economical way of raising large numbers of native perennials. By propagating native plants from seed, the genetic diversity of the species will be maintained, which helps create more resilient plant communities. Seeds can be saved for propagation from native plants already growing in your landscape, in family and friend’s gardens, and possibly parks and woodlands. However, it is essential to obtain permission from the property owner before collecting any plants or flower heads from private properties or public lands. Contact garden clubs or local libraries and ask about seed banks or exchanges as a resource for native seed.
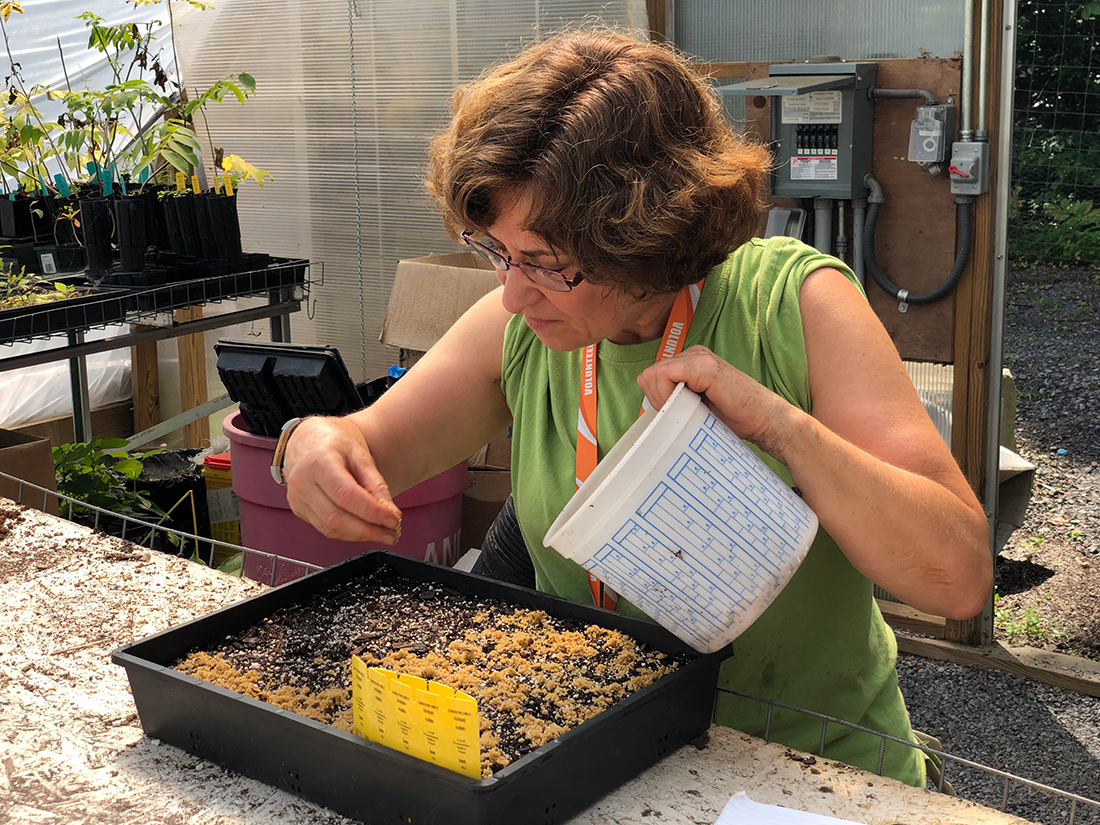
Figure 3. Sowing Ascelpias exaltata (Poke Milkweed) seed in sand over planting mix.
Gathering Seeds
Saving seeds is easy. Table 1 includes a chart showing when and how to collect seed from common native perennials. When collecting seed, make sure to collect a few seeds of the same species from as many different healthy-looking plants as possible to maintain genetic diversity. Only collect seeds from plants that have been positively identified and try to collect the same amount of seeds from each plant.
Of course, to save seed, gardeners must allow plants to go to seed, rather than pinching off flowers post-bloom to encourage new flower production. Make sure to gather seeds once the dew has dried. First, remove the plant’s seed heads from their stems once they have dried out and turned brown. A brown or tan coloring of the seed head is an indication that the seed has ripened.
Then, place the dry seed heads in a paper bag as plastic bags will hold moisture and may cause rot. For species that have berries, collect the ripened fruit and remove the fleshy parts. These seeds should be clean and dry before storage. Label the bags of seed with the date, location, species, and any other important information to avoid confusion at planting.
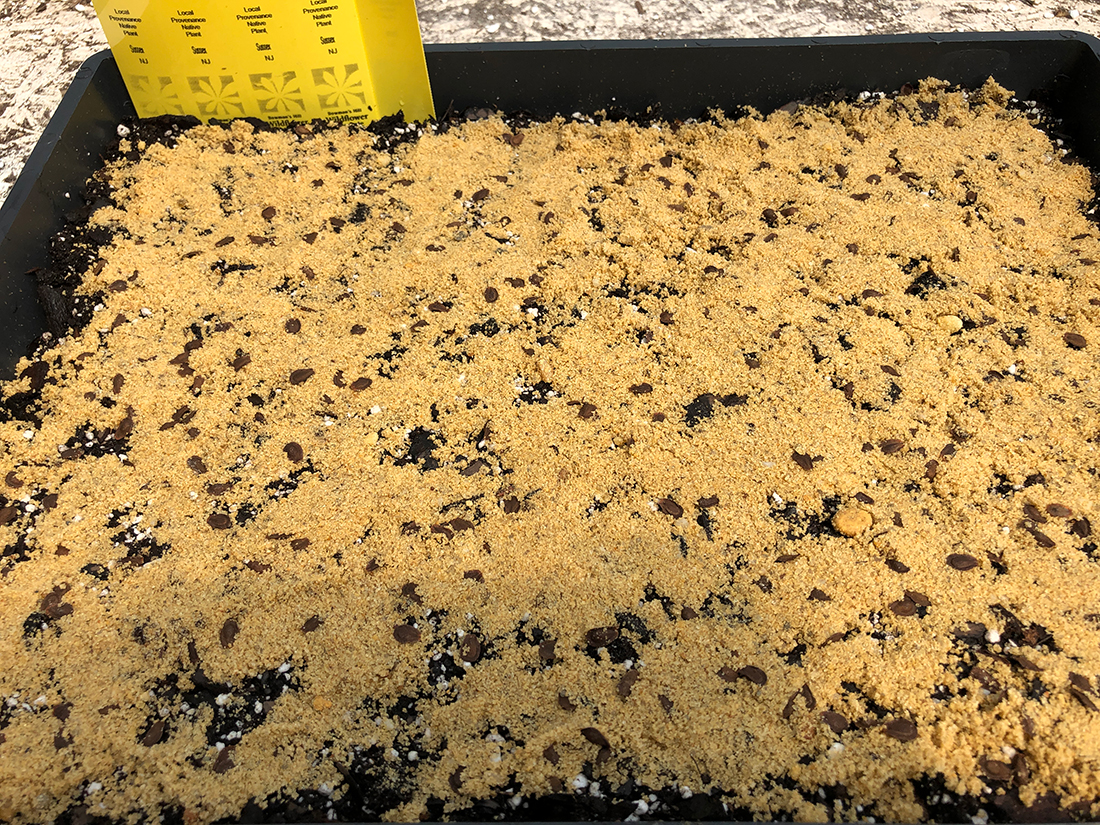
Figure 4. Seed in sand for Ascelpias exaltata (Poke milkweed).
Sorting and Cleaning Seeds
In a bowl, over a tray, lightly crush the seed heads you have cut from the plant through a sieve with a mesh just larger than the seed. Rub and press seed heads through the mesh sieve to remove the seed from the chaff. The chaff is the dry, protective seed covering and should be removed before planting.
Use a glass or metal tray. Do not use a plastic tray which can create "static cling." The seeds should fall through the sieve to the bowl below. Repeat the process using a smaller sieve until much of the chaff has been removed. This process can also be done with berries and fruit to remove the fleshy outer coating.
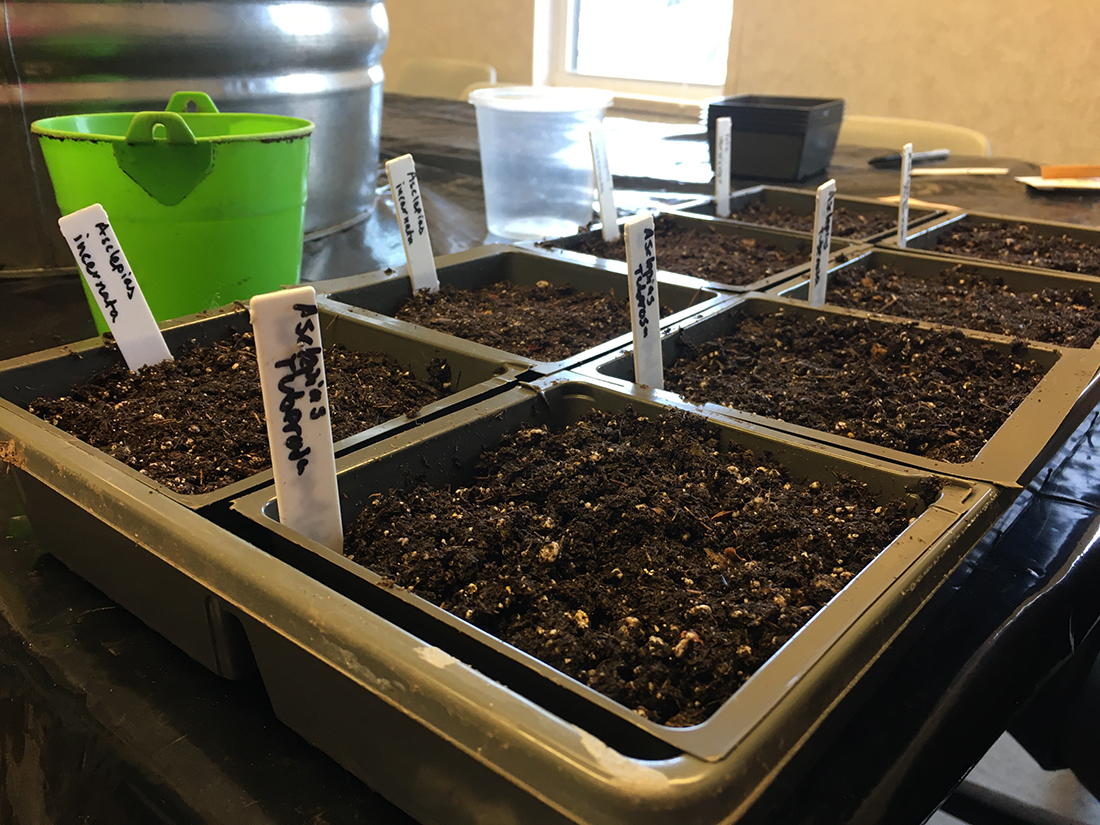
Figure 5. Labelled containers with species name and date planted.
Steps vary according to seed and conditions. Any sturdy sieve or kitchen colander can be used as long as there are a variety of mesh sizes. Since some seeds are toxic, the sieves or colanders should not be used for anything else in the kitchen.
You can also use a technique called winnowing which frees lighter particles of the chaff from the seed by gently blowing air across the seeds when placed on a plate or shallow bowl. Some seeds are light, and some are heavy. Adjust the technique depending on the material being winnowed and the air flow. You can use your breath, a light breeze, an adjustable fan, or even a hairdryer for winnowing.
Storing Seeds
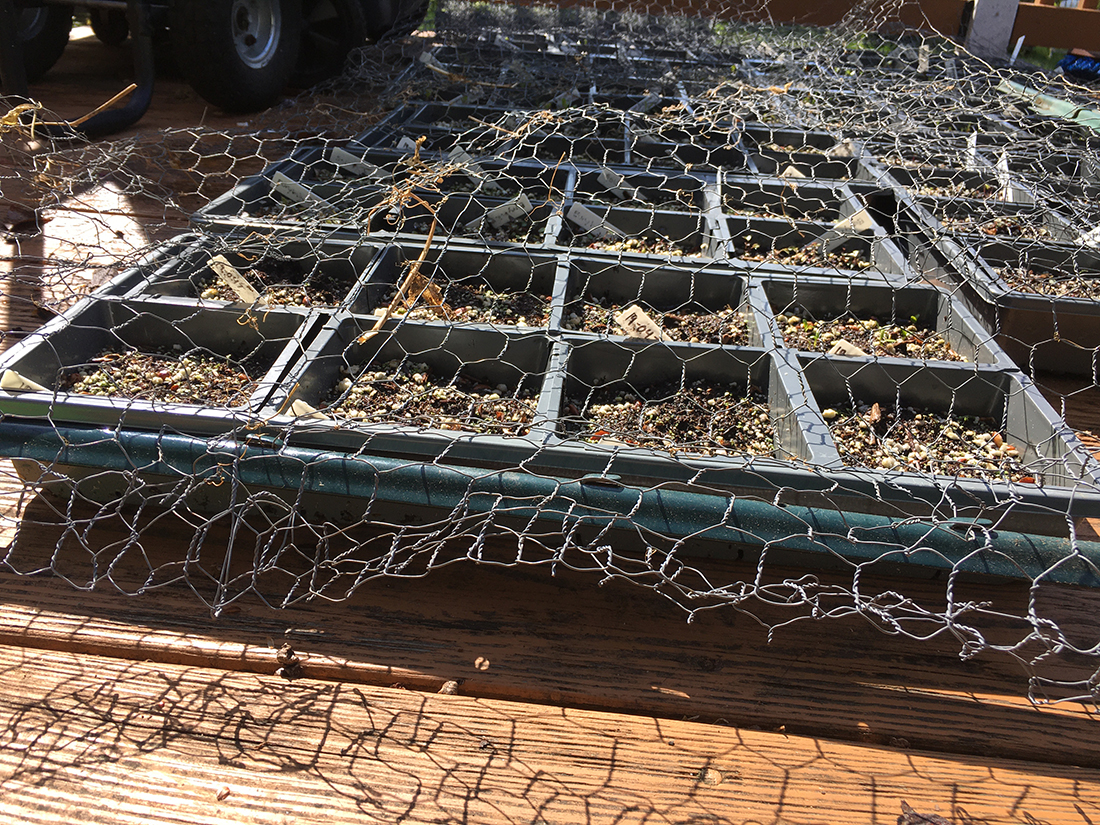
Figure 6. Over-wintering containers with chicken wire for protection.
Most seeds should be stored in a cool, dry location since seeds can deteriorate and die when exposed to warmth and humidity. Seeds have the longest lifespan if kept dry and stored in the refrigerator until ready for germination. Place dry seeds in a labeled paper packet inside an airtight, plastic container. If the seeds are to be stored wet, use a damp substrate such as peat moss, vermiculite, or sand and a plastic bag. A small funnel helps to place small seeds in a bag.
Some species need to be cold stratified, meaning the seed needs to be kept cold and moist for a period of time before they will germinate. The cold temperature mimics winter conditions that the seed would normally experience in nature.
It is important to research the species-specific needs before attempting germination. See table 1 for examples.
Germinating Seeds
There are two ways to germinate native seeds: indoors or outdoors. Both techniques are described below.
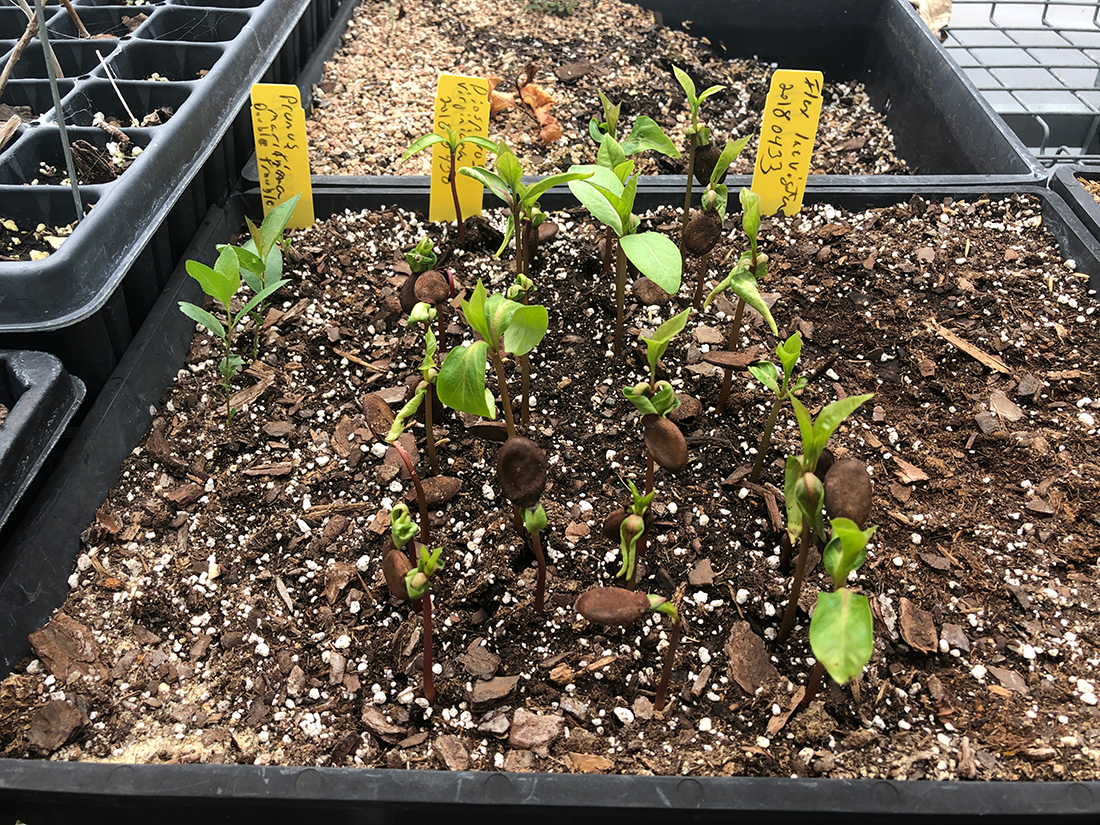
Figure 7. Cotyledons of Diospyros virginiana (Common-persimmon) 3 weeks after sowing.
Germinating Seeds Indoors
After cold-stratification of seeds, planting indoors is one way to germinate native seeds. Commercial soilless planting mixes should be used for germination and usually contain a mix of peat moss, perlite, vermiculite, sand, and bark. Using garden soil from a yard to start seeds in pots/containers is not recommended due to contamination issues. Fill a container that has drainage holes with moist growing mix. Dampen the planting mix in preparation for the seeds so the mix feels like a well-wrung sponge. Gently firm the planting mix down to within ½ inch below the rim. Create labels for each species with the plant name and date planted.
Sow the seeds evenly over the planting mix. Planting depth is important. A seed should be planted no deeper than twice its diameter or width. Lightly press seeds into the mix so they make contact with the soil.
Thinly sprinkle a shallow layer of planting mix over seeds. For seeds that need light to germinate, vermiculite or sand can be used, and the seeds should be sown at the surface. Misting with a spray bottle will prevent the seeds from drying out during germination. Once plants have germinated, water thoroughly, keeping the mix moist but not wet.
Once the seeds are planted, tent the container with plastic wrap to prevent moisture from escaping. Place the container in a sheltered location in direct sun at a suitable temperature for the seeds. The ideal temperature for most seed germination is 70–75° F. The cover can be removed once the seeds have germinated.

Figure 8. Handling Aquilegia canadensis (Eastern Columbine) seedlings.
Germinating Seeds Outdoors: Over-wintering
An even easier method for germinating seeds is to over-winter seeds outdoors. Native plants are accustomed to local climatic conditions and do not need to germinate indoors, in greenhouse-like conditions. Therefore, another option is to plant the seeds in the fall in containers, using the steps outlined above, and leave them outside where they will receive precipitation and cold conditions throughout the winter. They will naturally germinate in the spring once soil temperature increases. It will be necessary to protect your seeded pots from squirrels or birds that may dig in the pots, and possibly from extreme winter winds. Hardware cloth or chicken wire can be laid flat and weighed down with heavy objects over the seeded pots as protection. Monitor the seeded pots in the spring and water them if you notice the pots drying out once the seeds begin to sprout.

Figure 9. Transplanted Monarda fistulosa (Wild Bergamot) growing in plug trays.
Handling Seedlings
Once germination occurs, the first leaves to appear on the seedling are called cotyledons and are not true leaves, but the seed leaves. When the seedlings have multiple sets of true leaves and are large enough to handle, carefully transplant them individually into small pots (ideally 2" plug trays) filled with a moistened planting mix so the roots continue to develop. Carefully separate the seedlings by teasing out the plants, handling the seedlings by the leaf and not the stem from the seeding tray so as not to damage the roots.
Some plants do not like their roots to be disturbed. In these cases, you can use degradable peat pots to minimize handling and repotting.
Seedlings need bright light and even moisture. Continue growing your new seedlings until they are well established.
Label and water the seedlings. Keep the seedlings in a location that is appropriate for the type of plant, either sun or shade, but move it gradually to its final location.
Table 1 is a handy chart of 10 Common Native Perennials showing the time of year when the seeds ripen and the proper technique for germination.
| Name | Seed Ripening Period | Germination Technique |
|---|---|---|
| Agastache nepetoides Giant Yellow Hyssop |
Collect seeds 3–4 weeks after flowering when the seeds begin to darken. Late summer to early fall. | Seeds will germinate within 4 weeks, if sown at 70° F |
| Heliopsis helianthoides False Sunflower |
Seeds ripen a month after flowering. Fall. | Seeds will germinate within 4 weeks, if sown at 70° F |
| Oenothera parviflora Evening Primrose |
The seeds are contained in the pod which ripen in mid-summer. | Seeds will germinate within 4 weeks, if sown at 70° F |
| Salvia lyrata Lyre Leaf Sage |
Collect seeds 3–4 weeks after flowering when the seeds begin to darken. Late summer to early fall. | Seeds will germinate within 4 weeks, if sown at 70° F |
| Coreopsis verticillata Whorled Tickseed |
Harvest when heads are yellow. Seeds are ripe when gray-black in color. Summer to fall. | Seeds will germinate upon shifting to 70° F after 90 days of moist cold stratification at 40° F |
| Echinacea purpurea Eastern Purple Coneflower |
Using gloves, harvest seeds by combing them from the dried heads. Late summer to early fall. | Seeds will germinate upon shifting to 70° F after 90 days of moist cold stratification at 40° F |
| Lobelia cardinalis Cardinal Flower |
Seeds are contained in inflated pods that ripen and split 3–4 weeks after blooming. Early fall. | Seeds will germinate within 4 weeks, if sown at 70° F. Seeds require light to germinate |
| Rudbeckia hirta Blackeyed Susan |
Once the center cone is brown and becomes dry, the seeds are ripe. Late summer to early fall. | Seeds will germinate upon shifting to 70° F after 90 days of moist cold stratification at 40° F |
| Vernonia noveboracensis New York Ironweed |
When the papas dries and the heads fluff out, the seeds are ripe. Fall. | Seeds will germinate upon shifting to 70° F after 90 days of moist cold stratification at 40° F |
| Ziziaaurea Golden Zizia |
Seeds are ready once the capsules darken to burgundy and then brown. Summer. | Seeds will germinate upon shifting to 70° F after 90 days of moist cold stratification at 40° F |
References
- Cullina, W., (2000) The New England Wild Flower Society Guide to Growing and Propagating Wildflowers of the United States and Canada. The New England Wild Flower Society.
- Toogood, A. (Ed.). (1999) The American Horticultural Society Plant Propagation. DK Publishing.
- U.S. Department of Agriculture, Forest Service: Gen. Tech. Rep. Fort Collins, CO. Raising Native Plants in Nurseries: Basic Concepts. Dumroese, R. Kasten; Thomas D.; Luna, Tara. 2012. DOI
The authors would like to thank Bowman’s Hill Wildflower Preserve, New Hope, PA for their guidance in developing this fact sheet and Angela Monaghan, Nick Polanin, and Madeline Flahive DiNardo for their peer review.
Photo credit: Valerie Szkodny (photos 1–4 and 7–9), Michele Bakacs (banner photos, and photos 5 and 6).
May 2021
Copyright © 2025 Rutgers, The State University of New Jersey. All rights reserved.
For more information: njaes.rutgers.edu.
Cooperating Agencies: Rutgers, The State University of New Jersey, U.S. Department of Agriculture, and Boards of County Commissioners. Rutgers Cooperative Extension, a unit of the Rutgers New Jersey Agricultural Experiment Station, is an equal opportunity program provider and employer.