

Fact Sheet FS1313
Soil compaction occurs when soil particles are pressed closer together, reducing the space between them and thereby increasing the soil’s density (Soil Science Society of America 2019). Soil compaction alters many soil properties and functions, whether physical, chemical, or biological in nature (Batey 2009). The loss of adequate spaces between the soil particles impedes the movement of air and water necessary for plant growth. Compacted soils can inhibit the growth of plant roots due to this lack of air and water, negatively affecting the health of crops, pastures, and landscape vegetation. Plant roots may be unable to develop enough force to penetrate the soil as it becomes denser, and little root growth occurs unless there are cracks or fissures in the soil that can be followed by the roots.
Organisms that live in soil also experience the negative effects that compaction can place on their environment. The limited pore sizes that result from soil compaction reduce the ability of organisms higher up the food chain to survive and perform their usual activities. Compaction makes it more difficult for soil animals like ants and earthworms to dig through the soil to create burrows and homes or to find food to survive. Soil organisms also require air and water that becomes limited in compacted soils, leading to a loss of these organisms.
In the home landscape, lawns, trees, and ornamental plants are also impacted by soil compaction. To help protect your investments of time, effort, and money in your lawn and landscape beds, remember to be aware of soil compaction and learn how to recognize if compaction is occurring. You can help to minimize compaction by reducing unnecessary soil disturbance and adding organic matter (such as compost) to soil.
What Causes Soil Compaction and What Are Its Effects?
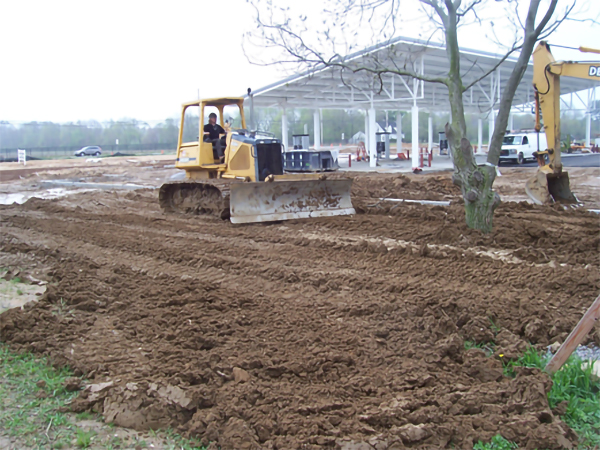
Figure 1. Soil compaction can occur during construction activities due to repeated operation of heavy machinery, especially when soil is wet.
Soil compaction occurs by application of mechanical forces, such as repeated or continuous wheel or foot traffic. Increased compaction of soils can occur due to construction activities (Figure 1), certain repetitive crop planting or tillage practices, or using heavy equipment to maintain residential landscapes. High pressure on the soil surface compresses soil particles into a close-packing arrangement that decreases the total pore volume between particles. Soil density increases as more particles (mass) are packed into a smaller space (volume). The degree of soil compaction is affected by soil texture (sand, silt, clay content) and moisture content (wetter soil being more susceptible), and of course by the degree and distribution of load pressure placed on the soil.
Dense soil with smaller pores has the result of decreasing the ability of water to infiltrate into the ground and through the soil. Compaction has many additional consequences due to reduced infiltration; surface runoff that can increase erosion is created, surface fertilizers or other soil amendments are displaced, potential sites for pools of standing water for mosquito habitat are made, and flooding concerns are increased. And of course, soil compaction negatively affects plant health by impeding root growth, limiting plants’ uptake of water and nutrients from soil, and preventing gas exchange with the atmosphere. Certain pathogenic organisms thrive under anaerobic conditions created by compaction and cause plant disease, especially root rot.
Methods to Assess Soil Compaction
To manage compaction, homeowners first need to determine if soil health is at risk due to compaction and, if present, the extent of compaction. In the laboratory, soil density is determined by weighing dried soil of carefully sampled soil volumes; this is not feasible for most homeowners. However, soil compaction risk often can be evaluated “in the field” (including residential properties) through a combination of many different techniques: visual clues, a simple test of soil hardness, and the proper use of soil compaction testers. Possible solutions to remediate compaction in one’s yard can then be implemented if compaction is occurring.
Visually Assess Your Yard
There are some outward signs that you can observe to identify where soil compaction may be occurring in your yard or property.
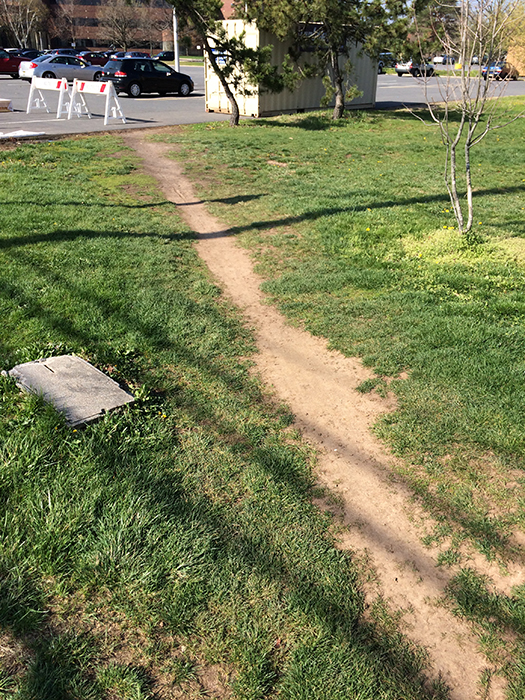
Figure 2: Pathways created by foot traffic can be indicative of compacted soils.
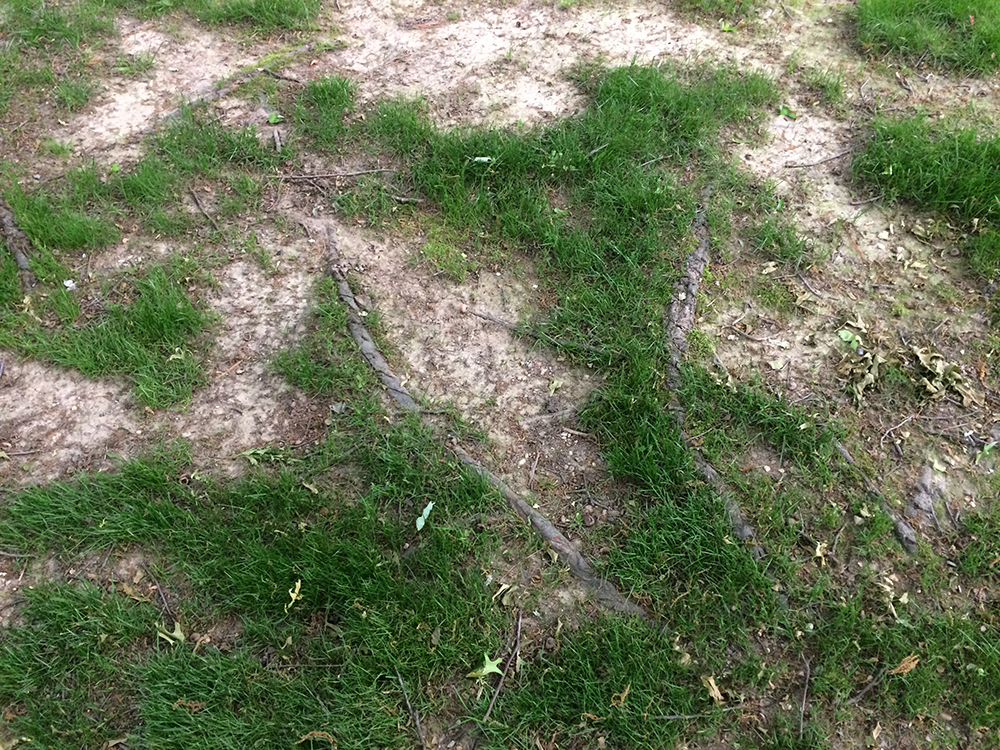
Figure 3: Shallow, surface roots can be a sign of soil compaction. In addition, areas of bare soil where plants cannot grow may indicate compaction.

Figure 4: Water ponding on the surface of the lawn can show compacted soils that are inhibiting infiltration into the ground.
These signs may also be related to other issues with your soil, so make sure you investigate what types of soils are present and conduct a soil test to verify the conditions, type, and any other problems with your soil.
Dig In
If there are any areas of your yard where compaction is suspected, the next step is to take a shovel, spade, or trowel to the soil. When looking for compaction, make sure to dig up soil that is moist, but not muddy; dry soil will always seem harder. Waiting two to three days after a rainstorm or irrigating is best. Moist soil that is hard and difficult to dig through or break up is exhibiting compaction. When digging, look for a surface crust or for “platy” soil structure that resembles a stack of dinner plates. Large dense clods will also indicate soil compaction.
Check Soil Hardness
Confirming the presence of soil compaction can be done by testing the soil hardness. This involves manually pushing a probe through the soil and measuring the distance the probe can be forced into the soil. The general idea is that the deeper the probe goes into the soil, the less compacted the soil. It is best to test for hardness when soils are moist, but not saturated. Be aware that stones, large roots, and other natural obstructions may interfere with this type of test.
When digging or performing probe tests in your yard, be sure to stay clear of any tree roots, underground pipes and wires, and irrigation lines. Underground utility mark outs are required prior to any digging, and are available free of charge by calling 811 or 1-800-272-1000, or visiting the NJ One Call website, www.nj1-call.org.
A quick and easy way to test for soil compaction is to use a wire flag as the probe (Figure 5). Hold the wire at the flag end and push the wire part of the flag into the soil until you can no longer get it further in the ground without the wire bending. If the wire is pushed to a depth of 12 inches or more, then the soil is considered not compacted and in good condition (OCSCD 2012). If the wire goes into the soil to a depth of between 4 inches and 12 inches without bending, the soil condition is fair. However, if the wire starts bending at a soil depth of less than 4 inches, the condition can be considered poor and compacted. It is best to test multiple spots in your yard when using this method, avoiding underground obstacles such as stones, roots, and irrigation lines. Note that 4 inches is considered the bare minimum depth for typical lawn grasses to develop a healthy root system, and 12 inches or more is suitable for most herbaceous ornamentals.

Figure 5: Wire flag being pushed into the ground to measure the soil hardness.
A more quantitative means to measure soil hardness is to use a penetrometer. A penetrometer consists of a pressure gauge mounted at the top of a pointed rod, which is pushed into the soil (Figure 6). The pressure gauge provides a measure of the resistance of the soil to penetration by the probe. The pointed tip of the penetrometer is designed to represent a plant root and “feel” the resistance from soil that a plant root would. The penetrometer is firmly and steadily pushed into the soil until the gauge reads 300 pounds per square inch (psi); the depth that the rod penetrated the soil up to the 300 psi reading is measured with a tape measure and recorded, with deeper penetrometer depths indicating less compact soils. This process is then repeated at various locations in your lawn or planting beds. A minimum of ten measurements per acre is a good rule of thumb when using a penetrometer to get a thorough understanding of soil density throughout the landscape.
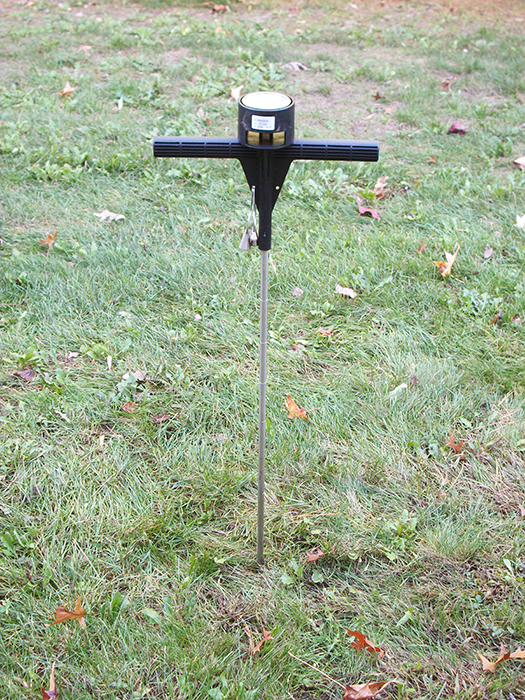
Figure 6: A static cone penetrometer, a.k.a. soil compaction tester.
Other factors that contribute to the level of resistance measured by the penetrometer are the soil texture and soil water content. If these procedures are part of your long-term lawn care, obtaining this additional information (soil texture, percent water) will help explain the level of resistance measured in your yard.
Practices to Remediate Compaction
To alleviate soil compaction, it is often necessary to break up the compacted soil by tillage as a first step. Tillage can be performed by a rototiller, but for an established lawn, core aeration (or aerification) is a common practice. Rototilling a compacted soil may require heavy equipment, but remember to try to avoid bigger, heavier equipment. The goal with tillage is simply to break the soil into small clods, not overdo it and pulverize the soil into dust; this only makes the loose soil particles susceptible to subsequent re-compaction. Core aeration leaves most of the yard surface and lawn vegetation intact but pulls cores (typically ½ to ¾ inch in diameter and 3 to 4 inches deep) from the ground. Therefore, core aeration only treats shallow compaction, but it can rapidly and significantly improve conditions in the topsoil. The cores that are left on the surface can be broken up and raked into the lawn, with some loose soil falling into the holes – but leaving improved porosity for infiltration and aeration. With improved growing conditions, vegetation and other organisms’ activity will gradually benefit the loosening soil.
Whether core aeration or more traditional tillage operations are used, amending the soil with organic matter, such as high-quality compost, will greatly contribute to the remediation of the compacted soil. Organic matter incorporated into soil helps prevent re-compaction of the mineral particles and so maintains porosity and drainage. Organic matter also “feeds” and maintains the soil organism activity that contributes to soil structure development. For example, burrowing earthworms and insects create channels, which act as aeration and drainage pores, and exudates from roots and microbes act as “glues” to build porous aggregates (as opposed to dense clods). Organic matter has other important benefits as well and is recognized as a major indicator of soil health.
In cases where soil calcium content is low, application of gypsum can help to build soil structure. Calcium ions act as a bridge between soil particles and begin the process of soil structural development, building aggregates and improving porosity between them. This contributes to improved soil infiltration, drainage, and aeration. Test the soil to determine if calcium is below optimum. If soil calcium is below optimum and pH is below vegetation’s optimum range, apply limestone (calcium carbonate) at the recommended rate to improve pH and increase soil calcium test level. If soil calcium is below optimum and pH is within or above the optimum range, apply gypsum (calcium sulfate) at the recommended rate to increase soil calcium test level without affecting soil pH. Gypsum is more soluble than limestone - suggesting that it could be distributed through soil with water, but compacted soil by definition starts with a permeability problem, and so it will be most effective to physically mix the gypsum or limestone into the soil after breaking up the compacted layer/area by tillage or core aerification. Keep in mind that if calcium levels are high or above optimum, gypsum is not likely to bring about noticeable changes in soil structure.
Prevent the Problem
Prevention of compaction should be given high priority to avoid the need for labor-intensive and long-term remediation practices. Dry soil will bear weight better than moist or wet soil, so avoid loads on wet ground. Keep in mind that heavier equipment and wetter soils cause compaction to greater depths that are more difficult to remediate. Heavy equipment (including mowers) should be avoided, and the length of time of loading is also important. Distributing the weight over a greater surface area will help, which can be accomplished by using wide tires and/or minimal allowable tire pressure. For certain temporary situations, use of plywood or similar material that will spread the load over greater surface area may be a solution. An “initial trip” over a path often does the most damage, but repeated trips exacerbate the compacted condition to a smaller degree. If repeated trips are necessary, control traffic to one path (use same wheel tracks repeatedly) to minimize total area impacted. Furthermore, with vehicles, avoid fast turns or otherwise spinning their tires, which “smears” the soil and further degrades its structure. Where compaction occurs from foot traffic, either create diversions to keep people or animals on paved surfaces or accept the path and make it official by paving or mulching.
In conclusion, determine where compaction is present and to what extent throughout your yard. This understanding will help you in the management of activities that can lead to compaction and, when it cannot be avoided, to provide possible solutions.
References
Other Resources
Mention or display of a trademark, proprietary product, or firm in text or figures does not constitute an endorsement by Rutgers Cooperative Extension and does not imply approval to the exclusion of other suitable products or firms.
Photo credits: Joseph Heckman (Figure 1), Steven Yergeau (Figures 2–3 and 5–6), Michael Gross (Figure 4).
January 2020
Copyright © 2025 Rutgers, The State University of New Jersey. All rights reserved.
For more information: njaes.rutgers.edu.
Cooperating Agencies: Rutgers, The State University of New Jersey, U.S. Department of Agriculture, and Boards of County Commissioners. Rutgers Cooperative Extension, a unit of the Rutgers New Jersey Agricultural Experiment Station, is an equal opportunity program provider and employer.