

Fact Sheet FS1244
Cooking in the garden is a rewarding endeavor that brings the growing classroom full circle from seed to plate. Growing vegetables with kids is a great first step to get them excited about vegetables, and they tend to be more willing to try foods that they grow themselves. Similarly, children are also likely to try foods that they cook on their own. While gardening gives children the skills to grow their own food, cooking shows them what to do with it.
Both gardening and cooking teach critical thinking skills and conceptual understanding. They offer opportunities for realworld application of math, science, literature, social studies, health and art; which makes it easy to connect with most common core standards.
Teaching children basic cooking techniques like chopping, mixing, and sautéing equips them with skills that they can use for the rest of their lives. Research shows that the more kids are exposed to unfamiliar foods, the more likely they are to try and eat them. Although cooking (especially outside) may seem challenging at first, with the proper cooking tools and preparation, anyone can learn to turn the garden into their very own experimental kitchen.
Planning & Organization
The key to a successful cooking activity is to be well-prepared. Consider keeping a checklist of supplies, to assure that you don't leave behind a cooking tool or key ingredient for your recipe. Also, you must know how many students will be participating to make sure you have enough ingredients. Regardless of how long you think a cooking activity will take, it is wise to always bring a back-up activity in case it finishes early or if a recipe, such as applesauce, needs to cook and there is down time.
Outdoor Classroom Management
One fear that you may have is that chaos will ensue if a large group of children is outside. To maintain control and stay organized, it is important to have a detailed plan with plenty of jobs for kids to do. For 10 or less students, everyone can work on the same recipe without much complication.
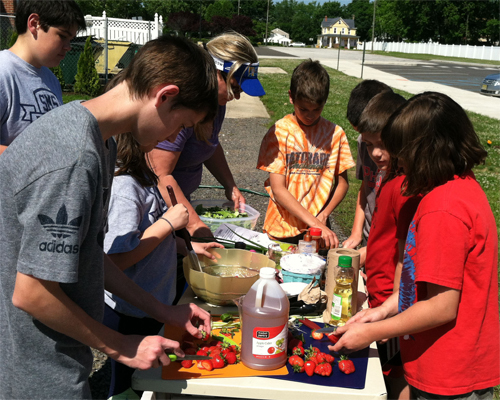
If a group is larger than 10, it is helpful to divide up into small groups, as long as there are other volunteers available to assist. Thirty kids can quickly turn into six groups of 5 kids—which is much more manageable. One strategy is to have different stations set up for them to rotate to, allowing each student to take part in every step of the recipe. This is useful when making a recipe like a vegetable pizza, where all the ingredients get put together at the end.
Another strategy is to give each group a specific part of the recipe to work with. For instance when you are making a kale smoothie, one group can remove the stems from the kale, one group can chop up a banana, one group can measure out yogurt, etc. No matter how simple the recipe may be, it is important to try and find as many jobs as possible for students to keep busy and contribute to the final product.
A third strategy is to divide up into groups, and each group makes their own recipe. This is a good option for something like a salad, as it is not too labor intensive and you can allow each group to customize their recipe, which allows for some creativity.
It can become quite challenging if at least one other volunteer is not present to help. An extra set of hands is very helpful when several kids are cooking at the same time. There is no magic number for the amount of support, but beginning with an adult-student ratio of 1:8 is a good start. Realize that different students need different levels of support as they cook, and know your age group before you determine how many volunteers to recruit. Consider asking parents, college students, or even culinary students looking for volunteer hours for assistance. For information on age appropriate cooking activities use: www.thekidscookmonday.org/kitchen-tasks-for-different-age-groups.
Supplies
- Fold-up cart or bags: Useful for storage and transport of supplies between the classroom and the garden, you'll want to have a cart or supply bag(s)on hand.
- An outdoor sink: For cleaning hands and washing off fresh-picked vegetables from the garden. Note: If no outdoor sink is available, a colander and hose work well for washing vegetables outside. Buckets filled with soapy water works for hand washing as well. However, the best option may be washing hands before heading outside, when possible.
- Fold up table: To do the actual cooking on this, make sure it is big enough for what you are making. More than one may be necessary.
- Canopy Tent: Helpful for shade, or protection from inclement weather.
- Basic kitchen supplies (measuring cups, measuring spoons, knives, spoons, forks, cheese graters, bowls, and plates): For preparing and eating the food.
- Cutting boards: Generally something always needs to be chopped, so cutting boards are a necessity.
- Cutting safety gloves: Very helpful when doing any kind of chopping or grating to decrease the chance of having any accidents.
- Trash bag and compost bag: Ideally most scraps can go in compost, but you may have some un-compostable materials that can be trashed.
- Paper towels and soap: Helpful for cleaning up the inevitable spills (and kids).
- Blender: Great for making smoothies, hummus, pesto, and drinks
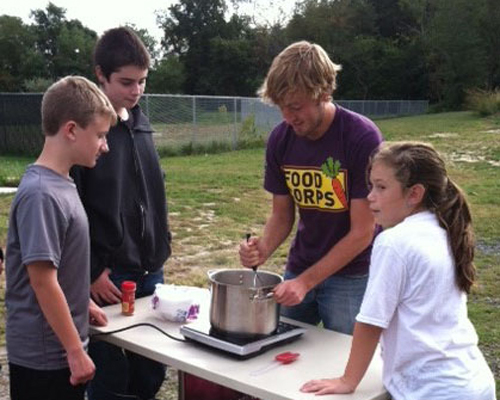
- Induction Cooktops + Pots: For any kind of stovetop cooking you want to do outside, such as applesauce, soups, and stews.
- Extension cord: An extension cord is a big help if you plan to use appliances outside, especially if an outlet is a far distance from the garden.
Kid-Tested Recipes
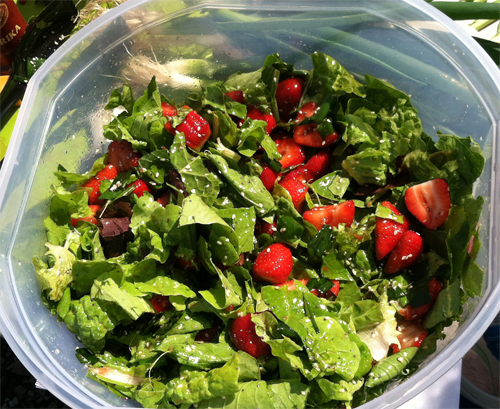
- Kale Salad: Students make their own dressing, massage the kale, and add their own additions like grated carrots, dried cranberries, or chickpeas to make it unique to their tastes. A general rule to follow for the dressing is, for every 3 cups of kale, use 2–3 tablespoons of a vegetable oil (olive or canola work well), 2–3 tablespoons of an acid (vinegar or lemon juice), and salt to taste. Massaging the kale with the dressing will cause it to shrink down and become much more tender.
Try this dressing recipe, courtesy of Lola Bloom of City Blossoms: Oil, Rice Wine Vinegar, Miso Paste, grated garlic and ginger, furikake seasoning (optional), sesame seeds, sliced radishes and cucumber. - Smoothies: Smoothies are versatile in the sense that you can follow a recipe or get creative and make it up yourself easily. Try this recipe for a Groovy Green Smoothie from the Whole Kids Foundation: 1 banana, 1 cup grapes (frozen for a thicker smoothie), 6 ounces vanilla yogurt, ½ apple, cored and chopped, and 1 ½ cups fresh spinach leaves.
- Hummus: A dip full of nutrients and fiber. Use carrots, celery, broccoli, or any other veggies growing in the garden to dip. Feel free to add anything else to this basic hummus recipe from www.inspiredtaste.net: 15 ounce can chickpeas rinsed and drained, ¼ cup fresh lemon juice, 1 garlic clove, 2 tablespoons olive oil, ½ teaspoon kosher salt, ½ teaspoon cumin, 1–2 tablespoons water, and paprika to sprinkle on top.
- Applesauce: Cooktop and Pot necessary. Use approximately 1 cup water per 8 apples (any variety of sweet apples available, such as Honey Crisp, Gala, Fuji, and Yellow Delicious). Cook on medium heat for about 30 minutes. Use a potato masher if necessary to break up large pieces. Leave cinnamon on the side for students to sprinkle in their bowls.
- Salsa: Great for using up summertime tomatoes. 3 cups tomatoes (chopped), 1 bell pepper (chopped), ½ onion (chopped), ¼ cup cilantro (chopped), 1 lime (juiced), ½ tsp cumin, ½ tsp salt, and ½ tsp black pepper.
- Spring Rolls: Helpful for anytime you don't know what to do with the vegetables growing in the garden. The only necessary supply is spring roll paper, which needs to be dipped in warm water for about 30 seconds to become foldable. Thin noodles (cellophane noodles are recommended) mixed with rice vinegar for the inside and soy sauce for dipping are optional additions. Have students harvest and chop up vegetables for the inside of the spring roll and demonstrate how to make it. Place all ingredients on one side of the paper leaving an empty inch or two for folding, and be careful not to overfill. Fold the half closest to you over the filling, fold the left and right sides in, and finish rolling.
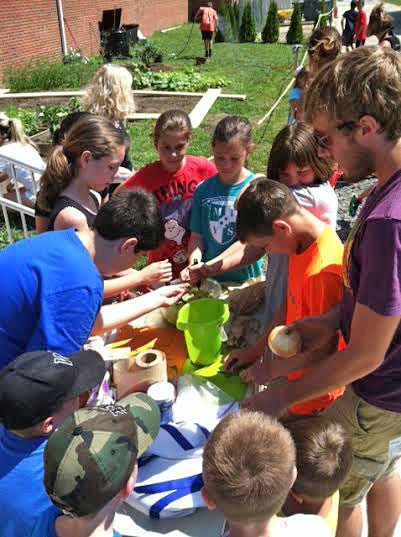
Figure 1.
Find more recipes at:
A Bounty of Benefits
Cooking outside can pose its challenges, but with the right amount of preparation, it can be just as easy as cooking inside. Cooking foods from the garden promotes healthy eating—and it offers an engaging (and tasty) option for teaching critical thinking and conceptual understanding. Instead of just talking about nutrition, cooking provides hands-on experience with healthy eating. Combining gardening and cooking helps to connect kids with food, gives them a better understanding of where their food comes from and introduces them to a world of new flavors, foods and skills that they'll use throughout their lives.
A Guide to Cooking Skills by Age
By Caroline Hire. Source: BBC goodfood, www.bbcgoodfood.com/howto/guide/guide-cookery-skills-age
Cooking with 3–5 Year Olds
3–5 year olds with their growing common sense, ability to follow instructions and dexterity, can undertake a wide range of skills. It will depend on your knowledge of each child, as skills can still vary greatly at this age.
Activities to try with 3–5 year olds
- Weighing: pouring or spooning ingredients into scales. Using measuring spoons
- Washing fruit and vegetables
- Cutting soft ingredients (e.g., butter, mushrooms, strawberries) using a strong plastic knife
- Breading and flouring: you can set up three stations with flour, beaten egg and breadcrumbs for fish fingers
- Mixing:- using either a spoon or hands to mix together ingredients
- Tearing and squashing: tearing herbs and lettuce or squashing fruit
- Sieving: it's best to balance the sieve over a bowl and tap it rather than shaking it around!
- Using a pestle and mortar: a light wooden one is better than a heavy one
- Kneading: light kneading can be fun but you'll need to step in to complete the task
- Rolling, shaping and cutting dough: choose plastic cutters and a small rolling pin
- Spreading: buttering bread and spreading icing
- Podding, picking and hulling: podding broad beans, picking leaves, tomatoes or grapes off the vine and hulling strawberries
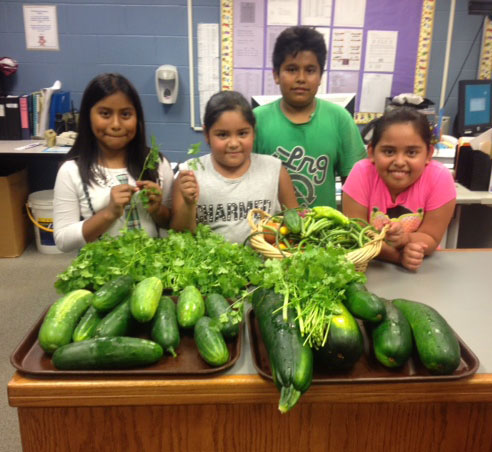
Figure 2.
Cooking with 5–7 Year Olds
Along with the skills suggested for 3–5 year olds, you can now introduce children to trickier techniques and equipment. At this stage, children can use a knife designed for young cooks or a small adult one.
With the introduction of sharp cutting tools like knives and scissors, always consider the ability of a child and if you're not comfortable, then leave it for a while. There are still other more complex skills they can enjoy. If you do think they can manage then still always keep an eye on them as it's very easy to slip even for adults.
Activities to try with 5–7 year olds
- Cutting using a small knife: children should learn how to form their hand into a claw to keep fingertips out of danger, take a look at a knife skills video
- Cutting with scissors: if you can get smaller scissors or children's scissors, use them to snip herbs
- Grating: fingers can easily be grated so keep watch and make sure they don't get too close to the end of whatever they're grating
- Measuring: even the very youngest children can do this but as children learn to read and do basic math, this is a great opportunity for them to do this with less supervision
- Rubbing in: rubbing in flour and butter with fingertips is called for in many recipes
- Beating and folding: show children how to beat cake mixture with a wooden spoon or fold in egg whites without knocking out too much air
- Greasing and lining a cake tin or tray
- Peel oranges or hard-boiled eggs: make sure eggs aren't too hot, run them under the cold tap first and be careful of residual heat
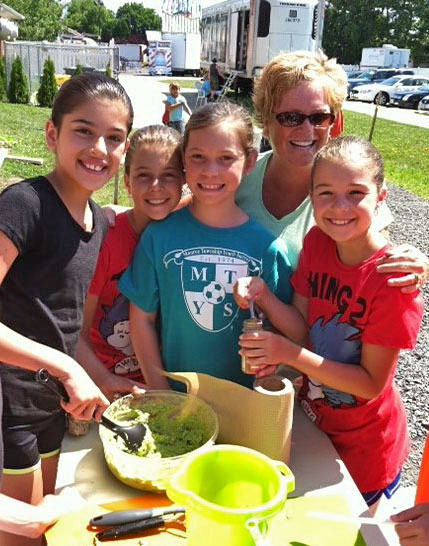
Figure 3.
Cooking with 8-11 Year Olds
Along with the skills suggested for 3–5 and 5–7 year olds, when children reach 8+, they can start to get involved with planning and undertake activities with a bit more independence. Supervision is still key due to the number of hazards in the kitchen but take a hands off approach where possible.
Activities to try with 8–11 year olds
- Planning the family meal
- Following a simple recipe
- Finding ingredients in the cupboards and fridge
- Using a peeler
- Whisking, using a balloon whisk or handheld mixer
- Using heat on a grill, oven and microwave
- Making salads
- Opening cans
Cooking with 12+ Year Olds & Learning Opportunities for All
Along with the skills suggested for 5–7 and 7–11 year olds, when children reach 12+, they can begin to prepare more complex recipes and even start improvising. How much they can achieve depends on how interested they are in cooking and how much they've done before. Even much older children should have some supervision to avoid accidents in the kitchen.
- Recognizing kitchen equipment and learning how to use it
- Reading and following recipes in order to create the final dish
- Following instructions—young children are particularly inclined to want to add more, jump stages or taste when they shouldn't
- Different tastes, textures and foods
- Time and patience
- The science of cooking; what happens to things when you apply heat or cold
For More Information
FoodCorps is a nationwide team of AmeriCorps leaders who connect kids to real food and help them grow up healthy. Service members go into communities and work on 3 pillars: Knowledge, which means food and nutrition education; Engagement, such as cooking and gardening activities; and Access, meaning securing local produce for school cafeterias. More information can be found at www.foodcorps.org.
In New Jersey, Rutgers Cooperative Extension's Family and Community Health Sciences Department (FCHS) works with families, schools and communities to make healthy lifestyle education an integral component of the school. Visit growhealthy.rutgers.edu for information on Grow Healthy, FCHS's garden-enhanced nutrition education initiative. Learn how you can join Grow Healthy and bring this statewide wellness and gardening initiative to your school. Check out the FCHS websites, too: njaes.rutgers.edu/fchs.
July 2015
Copyright © 2024 Rutgers, The State University of New Jersey. All rights reserved.
For more information: njaes.rutgers.edu.
Cooperating Agencies: Rutgers, The State University of New Jersey, U.S. Department of Agriculture, and Boards of County Commissioners. Rutgers Cooperative Extension, a unit of the Rutgers New Jersey Agricultural Experiment Station, is an equal opportunity program provider and employer.